Tutorial: Duck Tape Flower Pens
I just learned how to make these cool Flower Pens, using Duck Tape! I like them so much and wanted to share how I make them. This project may be a trial and error for some to get the technique just right, or the technique/results YOU like. Enjoy, hope you have fun with this project.
Supplies:
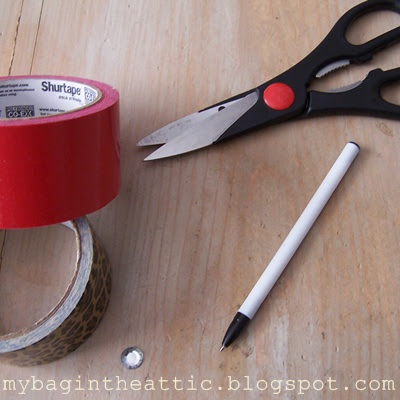


Supplies:
- 2 different colors of Duck Tape
- pen
- scissors
- rhinestone
- hot glue gun

Supplies

Measure the pens length with the first color of Duck Tape, make a small cut.

Finish the cut as straight as you can, wrap this piece of Duck Tape around the length of the pen.
The Pedals: Second color Duck Tape

Each piece of Duck Tape should be around 2 inches.

Fold the edges overlapping to make a tip, leave some sticky Duck Tape exposed.

I start my flowers low to the butt of the pen, I like to put rhinestones as the bud to decorate.

Fold both edges around the pen.

I like to put the first two pedals on then then add the rhinestone, that way you don't risk burning the Duck Tape later.

Keep wrapping your Duck Tape pieces around forming the flower, try to keep the pedal tips in a straight line at first, then they will "bloom".

See the "bloom"?

Take the first color and cover all the layers of Duck Tape that form the flower and create the leaf effect here, blending with the pen.

Finished Duck Tape Pen.
These are a great project to do with kids. Enjoy and have a great Monday all.
xoxo, Val


Comments
Post a Comment